
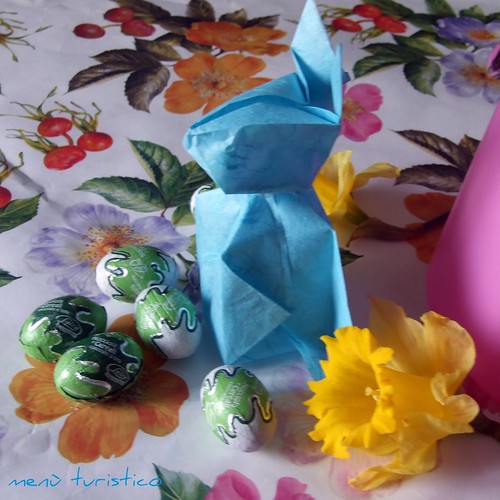
Eccoci arrivati ai coniglietti: iniziamo da quello creato con l'origami: è semplice, grazioso e si presta ad essere un segnaposto colorato e un po diverso per la tavola.
Ecco la procedura spiegata come al solito passo passo .
Here we are bunnies: we start from that created the origami is simple, graceful and lends itself to be a placeholder colored a bit different for the table.
Here is the procedure explained step by step as usual.
CONIGLIETTO PASQUALE
In questo tipo di origami, per la costruzioni del corpicino del coniglio e della sua testa, bisogna partire dalla "Base triangolare", che si costruisce :
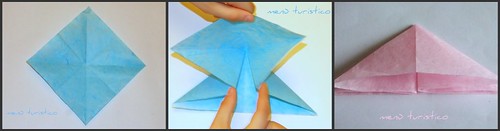
Segnate le diagonali e le mediane del foglio quadrato e poi piegate come nella foto. Mark the diagonals and medians of the square sheet and then folded as shown in photo.
Il corpo del coniglietto:
The body of the rabbit:

1)Partite dalla base triangolare. Sollevate in alto la punta destra e sinistra, quindi ripetete dietro. 1) Start in the triangular base. Lift up the tip left and right, then repeat back .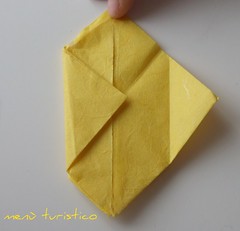
2)Piegate la punta sinistra oltre la linea centrale, quindi ripetete dietro.
2) Fold the left point over the center line, then repeat back.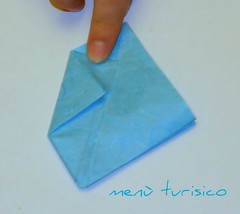
3)Piegate la punta in alto a sinistra come nella foto, quindi ripetete dietro. 3) Fold the tip at the top left like in the picture, then repeat back.
4)Inserite la linguetta triangolare nella tasca, quindi ripetete dietro. 4) Put the triangular flap pocket, and then repeat back.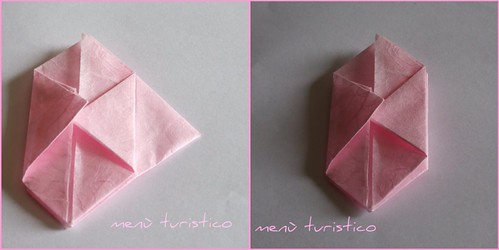
5) Piegate la punta destra sulla linea centrale inserendola sotto la punta di sinistra, quindi ripetete dietro. 5) Fold the right tip on the central line inserted under the tip of the left, then repeat back.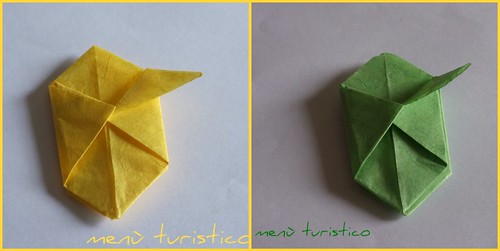
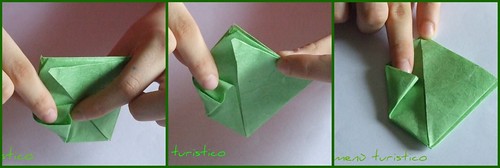
6)Piegate la punta in alto verso il basso e a destra, quindi ripetete dietro. 6) Fold the tip up down and right, then repeat back.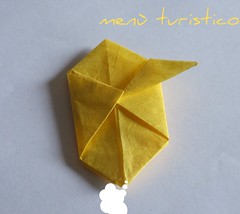
7)Soffiate dall’ estremità inferiore per gonfiare il corpo ( sul simbolo della nuvoletta). 7) Blow from 'bottom to inflate the body (the symbol of the cloud).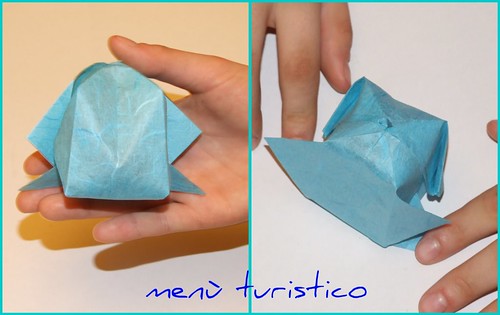
8)Il corpo del coniglio è terminato. 8) The body of the bunny is finished.
La testa del coniglietto:
The head of the rabbit:
1) Partite dalla base triangolare. Sollevate la punta sinistra e la punta destra sulla sommità. 1) From the base triangle. Lift the top left and the right toe on top.

2) Portate le due punte indicate sulla linea centrale. 2) Bring the two points indicated on the center line.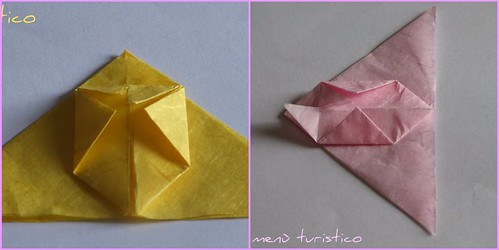
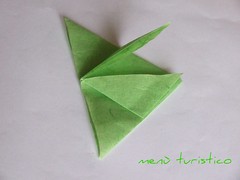
3) Piegate le due piccole punte in alto come indicato. 3) Fold the two small spikes at the top as shown.
4) Inserite le due linguette nelle tasche corrispondenti. 4) Insert the two tabs into the corresponding pockets.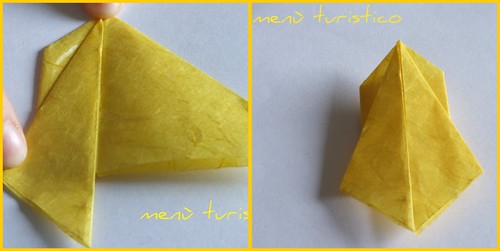
5) Girate il modello, quindi piegate i lati destro e sinistro del triangolo sulla linea centrale. 5) Turn the model, then fold the left and right sides of the triangle on the center line.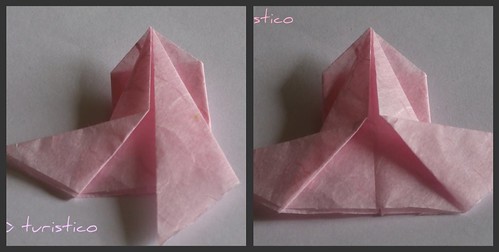
6) Sollevate le punte in basso verso sinistra e verso destra, in modo da fargli assumere la posizione della foto. 6) Raise the tips at the bottom left and right, so it assumes the position of the photo.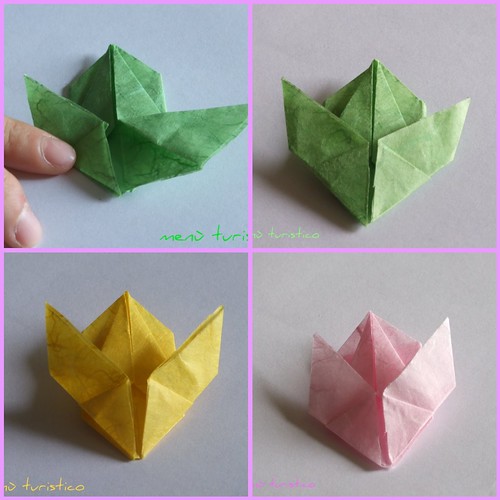
7) Piegate come nella foto. 7) Bend as in the picture.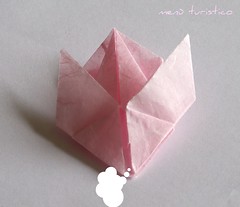
8) Soffiate nell’ estremità inferiore in modo da gonfiare la testa… 8) Blow in 'lower end so as to inflate the head ...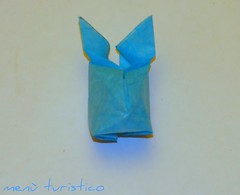
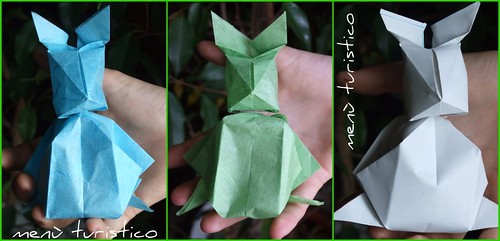
9) Ora la testina è pronta! 9) Now the cartridge is ready!
Posate la testolina sul corpo; eventualmente, per renderla un po’ più stabile, fissatela con un po’ di colla o scotch.
Drop the head on the body, possible to make it a little 'more stable, secure with a little' glue or scotch.
Ma se per un qualche motivo, dovesse anche piacervi un coniglietto da assaggiare avrei da suggerirvene un altro , un po' più ghiotto: ma per questo ci sentiremo più tardi!!
Buona Pasqua!! Happy Easter!!
Daniela e Ginevra
Tra gli origami natalizi e questi ho collezionato le istruzioni per bellissime tavole delle feste...li salvo subito!
RispondiEliminaGrazie Virò! Ginevra ne è contentissima!!
RispondiElimina