Di Daniela e Ginevra
Scroll down for English version
Eccomi a voi, come promesso alle mie amiche Tania e Virò, per spiegarvi passo passo come si realizzano i Babbo Natale di carta dell'
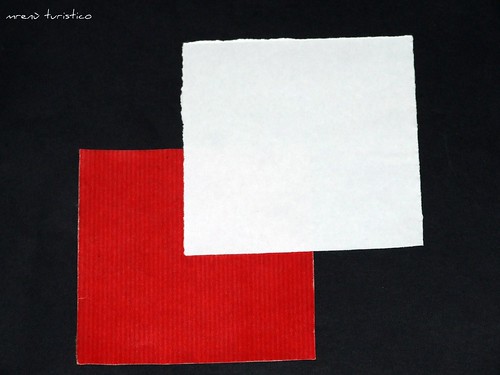
ultimo post, utilizzando gli origami. Ginevra si è prestata con gioia alla realizzazione di questo post senza ricetta per una volta, ma solo con le spiegazioni per realizzare dei graziosi segnaposto sulla vostra tavola natalizia. Ora, siccome la cosa è un po' lunghetta, partiamo subito con le prime foto. Innanzi tutto occorrono:
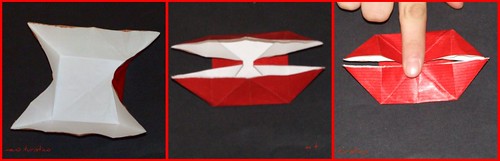
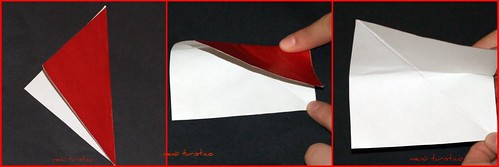
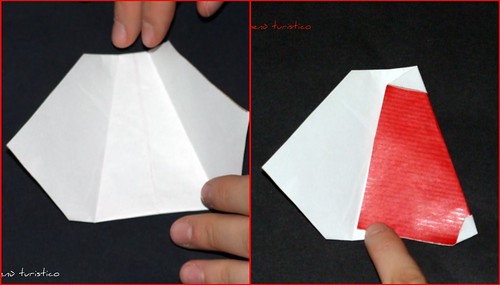
Cominciamo dalla testa:
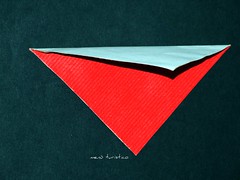
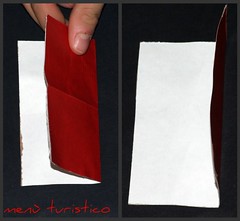
1 segnate, piegando, il foglio a metà, tenendo il colore sopra
2 ripiegate i lati sulla diagonale come in foto
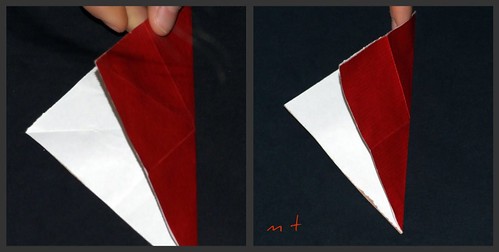
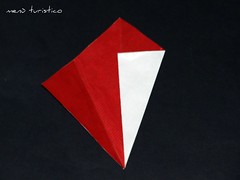
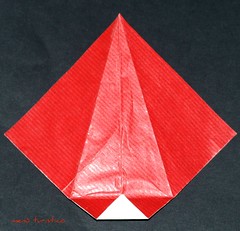
3 fate una piega a monte sul triangolo in alto. Portate la punta in basso sulla piega a monte quindi aprite

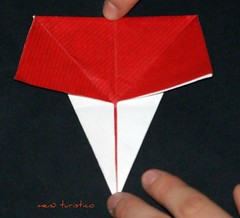
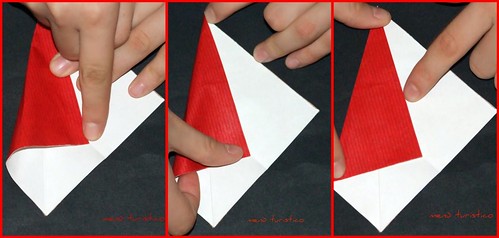
4 Fate 2 pieghe a valle prendendo come riferimento la piega segnata al punto 3

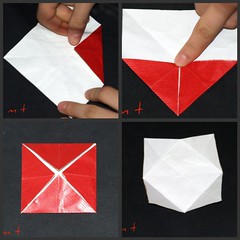
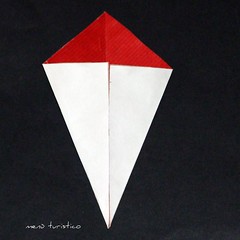
5 capovolgete (girate) il modello
6 piegate le alette laterali sulla piega centrale
7 fate 4 pieghe a valle come indicato
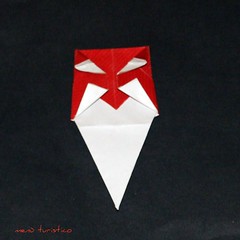
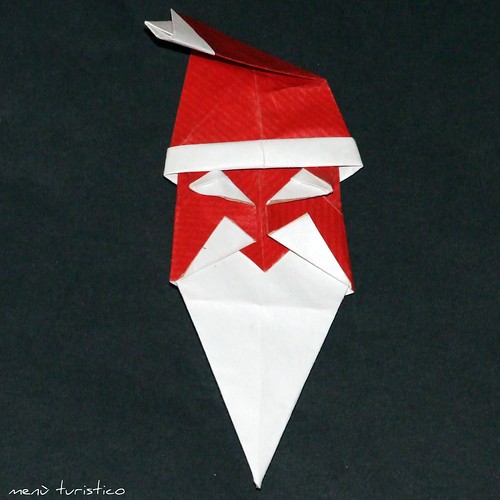
8 la testa di Babbo Natale è terminata!
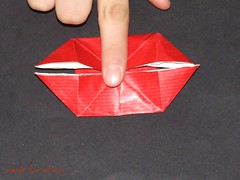
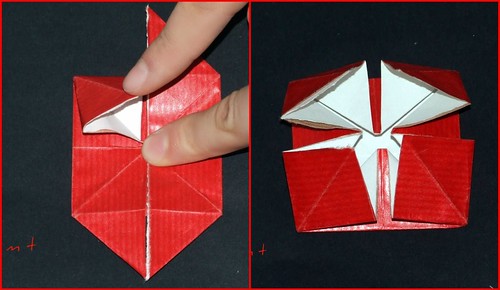
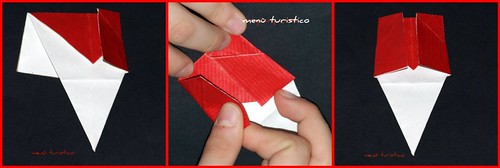
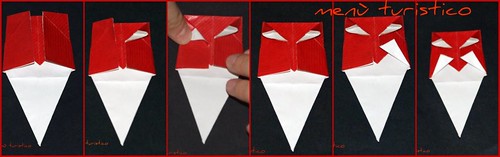
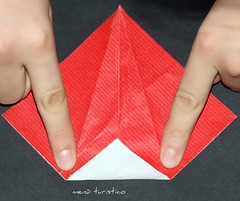
Ora il cappello:
1 Lasciate il colore sotto. Dopo aver segnato la diagonale verticale, piegate e aprite la piega a valle, come indicato.
2 Segnate la seconda piega a valle portando l'angolo sinistro del quadrato sulla piega realizzata al punto precedente

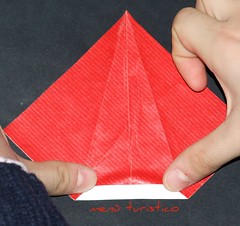
3Piegate il bordodestro sulla piega segnata al punto 2. Aprite la piega quindi capovolgete il modello.
4 Segnate una piega a valle prendendo come riferimento l'estremità delle pieghe fatte ai punti 2 e 3
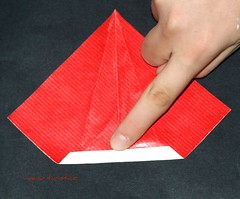
5 Portate la punta in basso sull'intersezione delle pieghe.

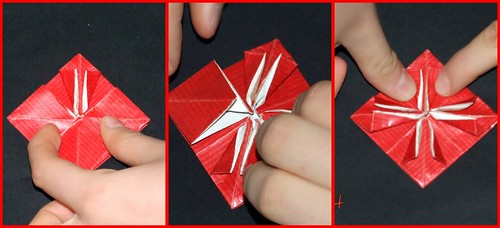
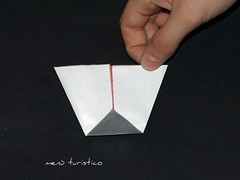
6 Ripiegate il bordo inferiore del modello come indicato nello schema.
7 Piegate una prima volta lungo la piega esistente
8 Piegate una seconda volta....
9 Ripiegate la punta in alto (a occhio, non c'è un vero riferimento) quindi girate il modello
10 Piegate il lato destro lungo la piega esistente
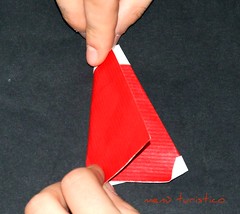
11 Piegate il lato sinistro lungo la piega esistente, inserendo l'angolo sinistro nella tasca di destra

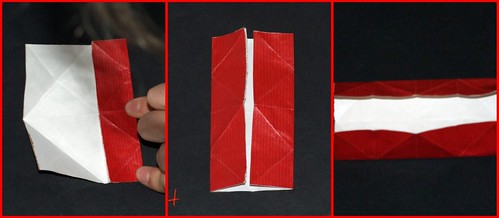
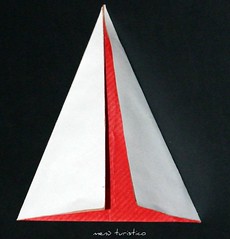
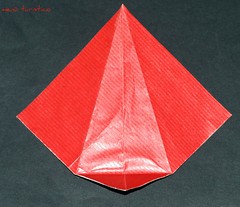
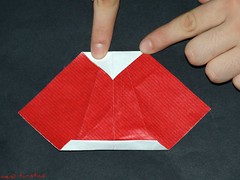
12 Si ottiene questo risultato. Ora capovolgete il modello.
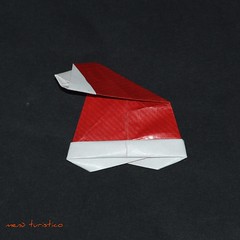
13 Fate una piega in diagonale, come indicato.
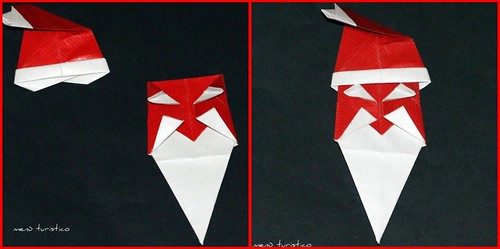
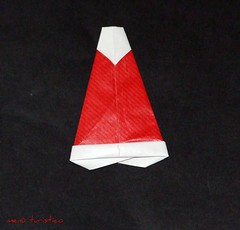
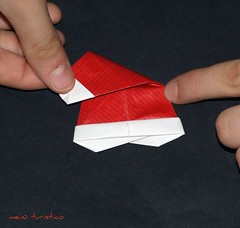
14 Ora potete completare la testa di Babbo Natale!!
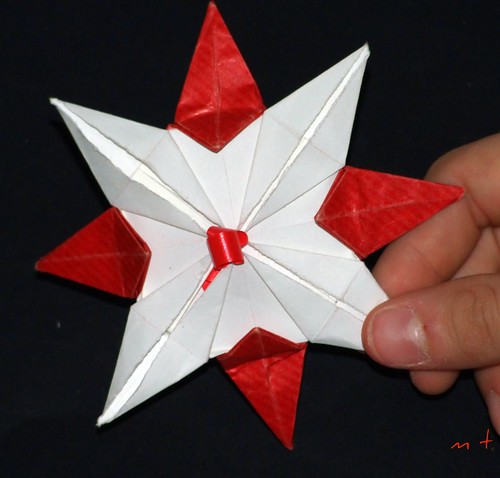
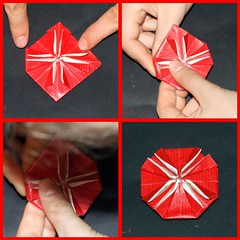
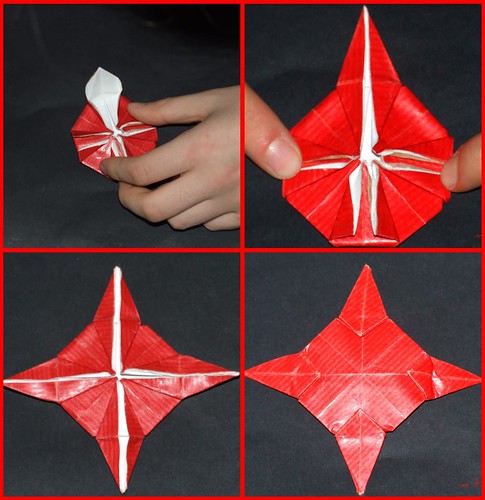
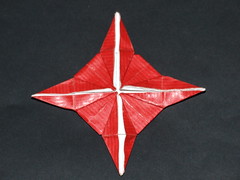
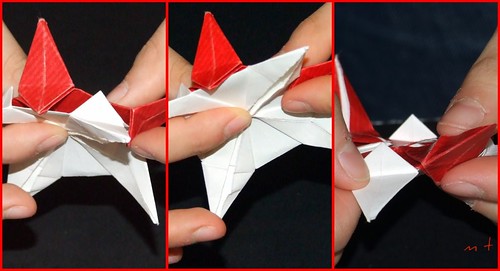
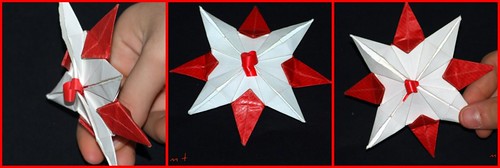
Come regalo ginevra ha pensato di dedicarvi anche una sua stellina, che la diverte molto fare e che è comunque un ottimo segnaposto o un decoro per l'albero. Ve la spiegheremo domani!!!!!
Una buona giornata a tutti
Daniela e Ginevra
Santa Claus and the origami
Di Daniela e Ginevra
Here I am with you, as promised to my friends Tanya and turned to explain step by step how to achieve the Santa Claus paper last post, using origami. Geneva lent itself happily to the creation of this post without a recipe for once, but only with the explanations to make the pretty placeholder on your Christmas table. Now, since it is a bit 'long, we start immediately with the first pictures. Firstly, they require:
• Sheets of paper two-tone white and red (this can be offset by gluing two sheets of paper with one white and one red) 10 x 10 cm. Crop 2 for each picture you prepare
• 10 minutes to figure
• size of the finished about 15 cm
We Start from the head
1 mark, fold the paper in half, keeping the color over
2 Fold the sides on the diagonal as in picture
3 make a crease on the triangle at the top. Bring the tip down on the fold so open
4 Fate 2 folds by referring to the crease at the point marked 3
5 Turn the model
6 fold the side flaps on the central fold
7 Do 4 folds as indicated
8 the head of Santa Claus is over!
And now the hat:
1 Let the color underneath. After scoring a diagonal vertical, bend and fold open the downstream, as indicated.
2 Mark the second fold, bringing the left corner of the square on the fold made in the preceding paragraph
3 Fold the right edge on the fold marked in step 2. Open the fold and then flip the template.
4 Marked a turn with reference to the downstream ends of the folds made in steps 2 and 3
5 Bring the tip down on the intersection of the folds.
6 Fold the bottom edge of the model as shown in the diagram.
7 Fold the first time along the existing crease
8 Fold a second time ....
9 Fold the tip up (by eye, there is a reference point) then turn the model.
10 Fold the right side along the existing crease.
11 Fold the left side along the existing crease, inserting the left corner into the pocket of the right.
12 You get this result. Now flip the model.
13 Make a diagonal fold, as indicated.
14 Now you can complete the head of Santa Claus!
Ginevra has decided to dedicate her even a little star, that much fun to do and that is still a great placeholder or a decoration for the tree. we explain it there tomorrow !!!!!
A good day to all
Daniela e Ginevra