Di Daniela
Scroll down for English version
Parlando di stagioni, e di come ci si accorga dei loro cambiamenti anche semplicemente osservando i vari malanni a cui vanno incontro i nostri figli, ho volutamente sorvolato su quanto deleterio sia l'influsso che ha su di loro l'inizio della primavera.... Infatti i teneri virgulti di casa, esattamente come i loro omologhi vegetali, avvertono un imprescindibile desiderio di rinascere a nuova vita dopo l'inverno, e questa loro rinascita fisico-spirituale si concretizza principalmente in una avvolgente ondata di quello che, fior di scienziati di tutto il mondo, hanno definito praticamente "voglia di far assolutamente niente di niente". Conoscete i sintomi? Penso proprio di si: occhio svagato da triglia bollita, passo distratto, risposte vaghe, ciondolamenti poltrona-divano-scrivania, deambulazioni smarrite per casa.... insomma i classici sintomi primaverili. Richiamarli alla realtà? Complicatissimo. Farli riemergere dal loro stato di prostrazione, spiegando che la natura in questo periodo si risveglia e che perfino i plantigradi si riprendono dal loro letargo invernale? Improbabile! Perciò si possono solo tentare "mezzucci" subdoli, come quelli di richiamare le loro mai abbastanza sopite papille gustative e, consentendo loro l'ingurgitazio di zuccheri a profusione, risvegliare anche parzialmente le attività cerebrali. In quest'ottica, la torta che vi suggerisco oggi è un'utile strumento ricattatorio nei confronti dei creaturini nullafacenti: infatti, per una fetta di questa delizia, sono certa saranno disposti a studiare perfino per alcuni minuti consecutivamente!!!!
Prima di cominciare una precisazione: come spesso accade nel corso della preparazione delle ricette un po' di impazienza crea qualche pasticcio: nel mio caso sono stata troppo precipitosa nel versare la gelatina di fragole sulla torta di yogurt. Risultato? la gelatina era troppo liquida ancora e così, invece di rimanere tranquilla in superficie, si è insinuata fin sotto il composto di yourt, creando una sorta di cuscinetto di gelatina tra quello e la base di biscotto. Il sapore non ne ha risentito neppure un po', il look forse un pochino perchè il secondo strato di gelatina avrebbe dovuto essere più abbondante. Però la torta era squisita e la prossima volta penso che riprodurrò questo "incidente" di percorso, aumentando un po' solo la copertura di fragole. Intanto vi do la ricetta "regolare" e poi si vedrà...
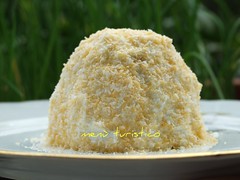
Torta di yogurt e gelatina di fragole

Ho trovato la ricetta
qui, chiara e semplice da eseguire. Ho apportato però alcune variazioni e qualche precisazione che vi spiegherò strada facendo
per il fondo
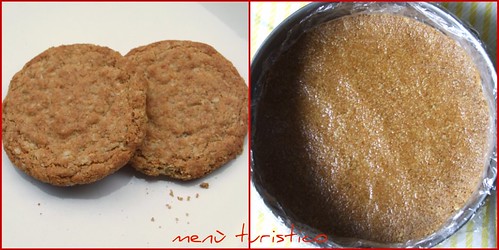
220 gr Biscotti secchi (io ho utilizzato dei buonissimi Digestive all'avena!)
150 gr Burro fuso
2 cucchiai Zucchero di canna
per la crema di yogurt
6 gr colla di pesce (ne ho messi 8gr)
4 cucchiai latte fresco intero
200 ml panna fresca da montare
500 ml yogurt cremoso già zuccherato (tipo Muller)
per la gelatina di fragole
6 gr colla di pesce (i miei sono 8)
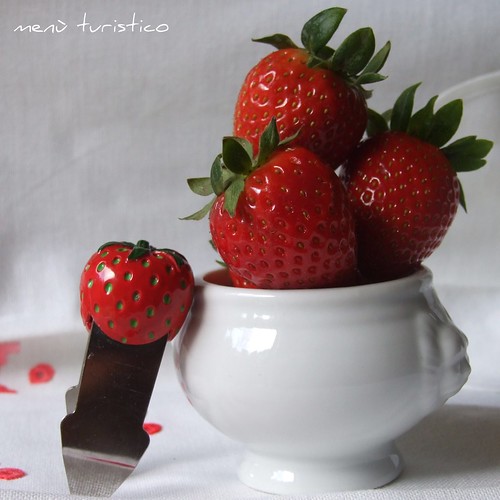
500 gr fragole
2 cucchiai di succo di limoni
100 ml acqua (io ho sostitituito sia l'acqua che il limone con del succo di arancia)
60 gr Zucchero
Iniziate mettendo i biscotti secchi nella tazza di un robot da cucina e riducendoli in polvere con le sue lame. Versate la polvere di biscotti in una ciotola nella quale aggiungerete due cucchiai di zucchero di canna e il burro fuso; mescolate per bene con un mestolo di legno fino ad amalgamare il tutto. Spennellate con del burro uno stampo a cerchio apribile di 22-23cm di diametro e foderatelo con della carta forno ritagliando un cerchio dello stesso diametro dello stampo e due strisce della stessa altezza dei bordi (Io ho facilitato il tutto utilizzando della pellicola da cucina trasparente) .
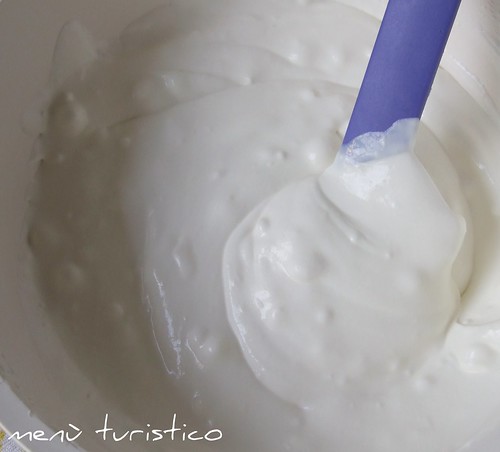
Versate all’interno dello stampo il composto di biscotti .Con l’aiuto di un cucchiaio o di una spatola, pressatelo sul fondo livellandolo per bene . Ponete lo stampo nel frigorifero per mezz’ora. Nel frattempo iniziate a preparare la crema di yogurt : ponete 8 grammi di colla di pesce (4 fogli da 2 gr l’uno) ad ammollare in una ciotola con dell’acqua fredda . Trascorsi 10 minuti, versate 4 cucchiai di latte in un pentolino e scaldatelo senza farlo bollire. Non appena i fogli di colla di pesce saranno morbidi, strizzateli con le mani e uniteli al latte caldo (il pentolino non dovrà più trovarsi sul fuoco), mescolando per farli sciogliere per bene. Lasciate raffreddare il composto di colla di pesce. Montate a neve ferma la panna fresca, versatela in una ciotola ed unite delicatamente lo yogurt, mescolando con una spatola dal basso verso l’alto per non smontare la panna. Unite infine al composto la colla di pesce ormai non fredda, come diceva la ricetta originale, ma tiepida, mi raccomando, disciolta nel latte.
Estraete dal frigorifero lo stampo contenente la base di biscotti e versatevi sopra la crema di yogurt; riponete in frigorifero per almeno 2 ore. Mezz’ora prima dello scadere delle 2 ore, cominciate a preparare la gelatina di fragole. Mettete in ammollo in una ciotola di acqua fredda 6 gr di colla di pesce (altri 4 fogli da 2 gr l’uno). Di qui partono i miei suggerimenti, che si distaccano in parte dalla ricetta originale. In un pentolino, fate sciogliere 60 gr di zucchero con 100 ml di succo di arancia filtrato. Invece di unire i fogli di colla di pesce a tutto il composto, usatene solo 2 in metà del liquido procedendo come al solito cioè, strizzatela ed unitela alla metà dello sciroppo preparato (lontano dal fuoco) mescolando per scioglierla per bene, quindi lasciate raffreddare. Prendete le fragole ed eliminate la sommità verde quindi lavatele velocemente sotto l’acqua corrente, scartando eventualmente i frutti rovinati. Mettete la metà delle fragole nel frullatore insieme ai 2 cucchiai di succo di arancia (o limone) e riducete il tutto in una crema liscia. Passate il composto al setaccio per eliminare tutti i semini. Non appena lo sciroppo con la colla di pesce sarà freddo unitelo alla salsa di fragole. Estraete lo stampo dal frigorifero ed accertatevi che la crema di yogurt sia diventata compatta, quindi versatevi sopra la salsa di fragole e rimettete di nuovo lo stampo in frigorifero per ancora 1 ora.

Pochi minuti prima della scadenza dell'ora, tagliate a pezzetti le fragole rimaste, e dopo aver sciolto gli ultimi 2 fogli di colla di pesce nel liquido rimasto, appena tiepido unitevi le fragole, mescolate e versate sopra la torta di yogurt e rimettete in frigo per almeno un'altra ora. Tiratela fuori dal frigo, eliminate la carta trasparente o da forno e mettetelo sul piatto di portata, accompagnandolo eventualmente con fragoline fresche o con coulis di fragole.
Buon appetito
Daniela
Yogurt and strawberry jelly cake
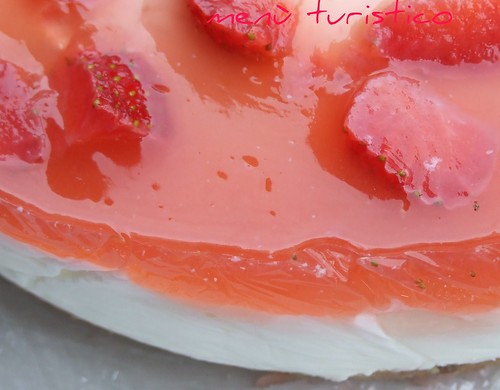
Before beginning a clarification: as often happens during the preparation of recipes, a bit 'of impatience creates a mess. In my case I was too hasty in pouring gelatin strawberry on the yogurt cream. The result? gelatine was too liquid and so, instead of remaining quiet on the surface of the cake, has crept up under the mixture of yogurt, creating a buffer between the cream and the base of biscuit. The taste did not suffer , the 'look maybe a little bit, because the second layer of jelly should have been more abundant. But the cake was delicious and the next time I'll do it, I 'll follow this "incident" path, raising a bit 'only the strawberries jelly. In the meanwhile I'll give you the "regular" recipe and then we'll see ...
I found the recipe here, clear and easy to do. But I've made some changes and some clarification that I will explain you
for the crust
I found the recipe here, clear and easy to do. But I've made some changes and some clarification which I'll explain to you
for crust
220 gr dry biscuits (I used the delicious Digestive with oats!)
150 g melted butter
2 tablespoons brown sugar
for cream yogurt
6 g gelatine (I put 8gr)
4 tablespoons fresh whole milk
200 ml fresh cream
500 ml creamy yogurt already sweetened (like Muller)
for strawberry jelly
6 g gelatine (mine are 8)
500 g strawberries
2 tablespoons lemon juice
100 ml water (I changed both water and lemon juice, with orange juice)
60 g sugar
Start putting the biscuits in the bowl of a food processor and reducing powder with its blades. Pour the powder biscuits in a bowl in which you add two tablespoons of brown sugar and melted butter, mix thoroughly with a wooden spoon to mix everything. Brush with butter a ring mold opening of 22-23cm in diameter and line with parchment paper by cutting a circle of the same diameter of the mold and two strips of the same height of the edges (I used transparent plastic wrap) .
Pour the mixture into the mold of biscuits. With the help of a spoon or a spatula, press and level it very well on the bottom. Put the mold in the refrigerator for half an hour. In the meantime started to prepare the yogurt cream: put 8 grams of gelatine (4 sheets of 2 g each) to soak in a bowl with cold water. After 10 minutes, pour in 4 tablespoons of milk in a saucepan and heat without boiling. Once the sheets of gelatine are soft, squeeze with your hands and add to hot milk (the pot will no longer be on fire), stirring to dissolve them . Leave to cool the mixture of gelatine. Whip the cream until stiff, pour into a bowl and add yogurt gently, stirring with a spatula from the bottom up. Mix the lukewarm gelatine, to dissolve it in milk.
Remove the mold containing the base of biscuits from the refrigerator and pour the yogurt cream. Store in the refrigerator for at least 2 hours. Half an hour before the end of 2 hours, start to prepare the strawberry jelly. Soak in a bowl of cold water 6 g of fish glue (another 4 sheets of 2 g each). But I suggest you to do this way: in a saucepan, melt 60 grams of sugar with 100 ml of orange juice filtrate. Instead of joining the sheets of gelatin in the entire compound, only use half of the liquid 2 in proceeding as usual, ie, squeeze it and add it to half of the syrup preparation (away from the heat), stirring to dissolve thoroughly, then let cool. Take the strawberries and remove the top green and then wash them quickly under running water, discarding any damaged fruit. Place half the strawberries in a blender along with 2 tablespoons of orange juice (or lemon) and reduce it into a smooth cream. Pass the mixture through a sieve to remove all seeds. Once the syrup with the gelatin is cold add to the strawberry sauce. Remove the mold from the refrigerator and make sure that the cream of yogurt has become compact, then pour over the strawberry sauce and put back the mold in the refrigerator for 1 hour more
A few minutes before the end of the hour, chopped strawberries left, and after dissolving the last 2 sheets of gelatin in the liquid left, just warm add the strawberries, stir and pour over the cake and put yogurt in the fridge for at least another hour. Pull out of the refrigerator, remove the tracing paper or baking dish and put it on, possibly accompanied with fresh strawberries or strawberry coulis.
Bon appetite
Dani